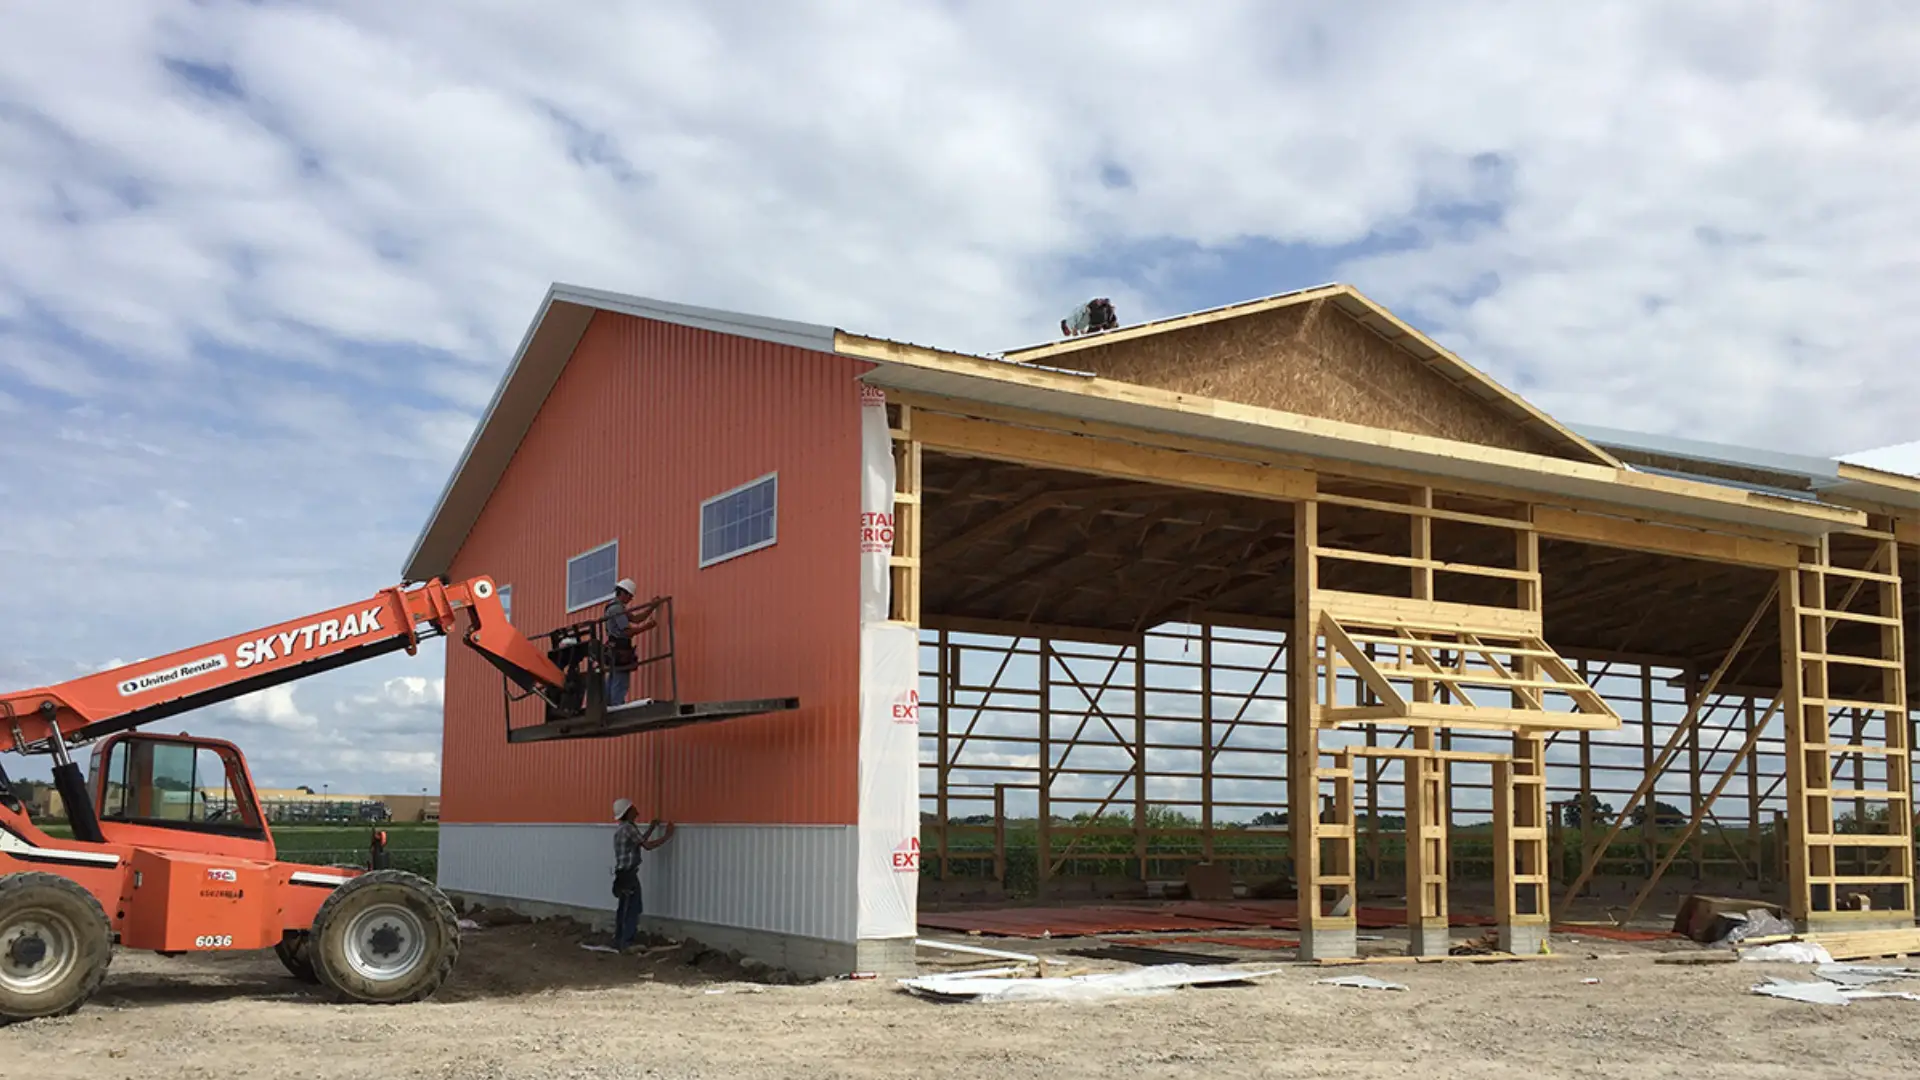
What Door Materials Hold Up Best in Exterior Building Applications

Exterior doors only perform as well as the material they are made from. In barns, shops, garages, and utility buildings, door material directly affects durability, maintenance needs, weather resistance, and long-term appearance.

In many exterior building applications, the best-performing door materials are the ones that resist moisture, hold finish well, and require less upkeep over time. That matters because working buildings are often exposed to more dirt, humidity, temperature changes, and wear than a typical home entry. Choosing a material only by price can lead to more maintenance later.

The right material also depends on the role of the door. A main entry on a finished building may justify a higher-end appearance and better detailing, while a side or service door may be selected more for toughness and simplicity. Country Building Co.’s positioning around balancing design, utility, and security is a useful way to evaluate door materials in practical terms.metalroofingsystems

The best long-term results usually come from matching the material to the application. A utility building should prioritize performance and low maintenance. A finished structure may need a door material that supports both architectural appearance and reliable exterior durability. The more realistic the use-case planning is upfront, the better the door will hold up over time.

Suggested internal links:

  • /doors
  • /exterior-building-products
  • /low-maintenance-building-materials

Suggested meta title: Best Door Materials for Exterior Buildings
Suggested meta description: Learn which door materials hold up best in exterior building applications like barns, garages, shops, and utility buildings.
Suggested SEO keyphrase: best door materials for exterior buildings

How Much Do Post Frame Building Kits Cost?

The first question almost every buyer asks is the same: How much is this going to cost? It’s the right question — and the frustrating truth is that most of the answers you’ll find online are vague, outdated, or don’t account for what actually drives the price of a post frame building kit.

This guide gives you real numbers, explains what drives cost up or down, and helps you build a realistic budget before you ever talk to a supplier.

What You’re Actually Paying For

When you buy a post frame building kit, you’re paying for:

  1. The engineered structural system — posts, trusses, girts, purlins
  2. Metal cladding — roofing and wall panels, trim, and flashings
  3. Doors and windows — included in some kits, quoted separately in others
  4. Building plans — engineered drawings stamped for permit submission
  5. Delivery — freight costs to your site, which vary significantly by distance

What the kit price does not include: site preparation, concrete work, local permit fees, contractor labor for assembly, or any interior work (insulation, electrical, plumbing, interior walls).

2026 Post Frame Kit Price Ranges

Building SizeTypical Kit Price RangeIntended Use
24×30$8,000–$14,000Small garage, hobby shop
30×40$12,000–$20,000Large garage, small barn
40×60$20,000–$35,000Equipment storage, workshop
40×80$28,000–$48,000Livestock barn, commercial storage
60×100$50,000–$80,000Large commercial, multi-use ag
60×120$65,000–$100,000+Large-scale agricultural or commercial

These are kit-only price ranges. Total project cost including site work, foundation, labor, and finishing will be higher.

What Drives the Price Up

Several variables push kit costs above the baseline:

Larger dimensions. Square footage is the single biggest cost driver. More square feet means more posts, more trusses, more metal — straightforward math.

Taller sidewalls. A 16-foot sidewall costs more than a 10-foot sidewall because it requires longer posts and more wall material. If you need to fit large equipment or tall vehicles, this is a necessary upgrade — but it adds cost.

Metal gauge and quality. Thicker steel panels cost more but last longer and perform better in harsh climates. Don’t let a supplier quietly downgrade your panel gauge to hit a price point.

Door and window configurations. Large sliding doors, roll-up doors, and commercial-grade entry systems add significant cost. A single 12-foot sliding door can add $1,500–$4,000 depending on specifications.

Engineering specifications. Buildings in high-wind zones, heavy snow load regions, or areas with specific seismic requirements require heavier structural components, which increases cost.

Delivery distance. Freight is real money. A kit shipping 500 miles will cost significantly more to deliver than one shipping 100 miles.

What Drives the Price Down

Simpler configurations. Rectangular buildings with standard sidewall heights and minimal door/window openings are the most cost-efficient.

Standard colors and profiles. Custom color matching and specialty panel profiles carry a premium. Standard color palettes are usually priced competitively.

Buying from a direct-supply kit company. Eliminating middlemen and buying factory-direct can save 15 to 25 percent compared to buying through a local dealer who marks up the same product.

Timing your order. Material costs fluctuate with steel markets. Ordering when steel prices are lower can meaningfully affect your kit cost.

Total Project Cost: What to Budget

If you’re budgeting for a complete, finished building — not just the kit — here are realistic total project cost ranges for common configurations:

Building SizeKit CostSite & FoundationLabor (Assembly)Total Estimated Budget
30×40$14,000$5,000–$10,000$6,000–$12,000$25,000–$36,000
40×60$25,000$8,000–$15,000$10,000–$18,000$43,000–$58,000
60×100$65,000$15,000–$25,000$20,000–$35,000$100,000–$125,000

These are honest ranges, not minimums. Plan for the middle of these ranges and you’ll be in good shape.

How to Get an Accurate Quote

The most important thing you can do is be specific when you request a quote. Know your approximate size, your intended use, your wall height preference, how many doors you need and what size, and whether you’re in a region with specific wind or snow load requirements.

The more detail you bring to the conversation, the more accurate your quote will be — and the fewer surprises you’ll encounter once the kit is on your site.

What to Know Before Adding Windows to a Utility Building

Adding windows to a utility building sounds simple, but it affects more than appearance. Before selecting size, style, or brand, it is important to think through how the building will be used, where natural light is actually helpful, and how the windows will affect security, wall layout, and thermal performance.

The first consideration is function. A utility building may be used for equipment storage, seasonal work, vehicle parking, or light workshop activity. That means windows should be planned around visibility, ventilation, and daylight needs rather than added only for looks. Country Building Co. emphasizes balancing quality, energy efficiency, and design options across its offered window brands, which is a useful framework when deciding what belongs in a more practical structure.metalroofingsystems

The second consideration is placement. Windows can improve lighting and comfort, but they can also reduce usable wall area for shelving, racks, cabinetry, or tool organization. In a utility building, every wall opening should earn its place. If a window does not improve the way the space works, it may not be helping the building.

The third consideration is maintenance and durability. Low-maintenance materials, reliable operation, and good weather performance matter more in utility settings because those buildings often receive less day-to-day attention than a home. Harvey and Silver Line both emphasize durable, low-maintenance window characteristics, while Andersen offers more premium performance options where the building use justifies it.hansenpolebuildings+1youtube

Adding windows can absolutely improve a utility building, but only when the window plan supports the building’s real job. The best approach is to think about use, layout, security, and long-term upkeep before ordering a single unit.

What Is Post Frame Construction? How It Works and Why It Lasts

Post frame construction is one of the most efficient building methods ever developed — but a lot of buyers come to it without fully understanding how or why it works. That’s not a problem. The concept is straightforward, and once you understand the basic principles, it’s easy to see why post frame has become the go-to choice for agricultural buildings, large garages, commercial storage, and an expanding range of residential applications.

The Core Principle: Load-Bearing Posts

In traditional stick-frame construction, the structural load of a building is spread across dozens of small lumber members — wall studs, floor joists, headers — all working together to carry the weight of the roof and walls down to the foundation. This system works, but it requires a lot of material, a lot of labor, and a continuous foundation to support it.

Post frame construction works differently. Instead of distributing the load across many small members, it concentrates the structural load into a small number of large vertical posts. These posts — typically large-dimension lumber columns or laminated post assemblies — are set at regular intervals and carry the weight of the roof trusses and the entire structure directly to the ground.

This single engineering difference has cascading benefits:

  • No continuous perimeter foundation required
  • No interior load-bearing walls needed
  • Faster construction timelines
  • Lower material costs
  • Wider clear-span interior spaces

The Basic Components of a Post Frame Building

Understanding post frame construction means knowing how the pieces fit together:

Posts. The vertical columns that carry the structural load. Most are pressure-treated lumber, either single large-dimension pieces or laminated assemblies of multiple boards. They’re typically set 8 to 10 feet apart along the building perimeter.

Trusses. The engineered roof framework that spans from post to post. Post frame trusses are designed to carry the full roof load without needing interior support, which is why large post frame buildings can be completely open inside.

Girts. Horizontal framing members that run between the posts on the exterior walls, providing a nailing surface for wall panels and adding lateral stability to the structure.

Purlins. Similar to girts but on the roof, running horizontally between trusses to support the metal roofing panels.

Metal cladding. The exterior skin of the building — roofing panels and wall panels, typically steel, that provide weather resistance and give the building its finished appearance.

Skirt boards and base trim. The lower-perimeter framing that closes the gap between the wall panels and the ground, controlling moisture and pest entry.

How Post Frame Compares to Other Methods

The most common question is how post frame stacks up against traditional stick-frame construction and pre-engineered steel buildings. The short answer:

  • Vs. stick frame: Post frame is faster, less expensive per square foot for large builds, and requires less foundation work.
  • Vs. steel buildings: Post frame typically costs less at moderate sizes, is easier to modify and expand, and allows for more flexible attachment of interior finishes.

Neither comparison is absolute — the right choice depends on your specific use case. But for agricultural, storage, workshop, and light commercial applications, post frame is almost always the most practical and cost-efficient solution.

Why Post Frame Buildings Last

A well-built post frame building isn’t a temporary structure. Modern post frame construction uses:

  • Pressure-treated lumber rated for ground contact, which resists rot and insect damage for decades
  • Engineered trusses calculated for the specific snow, wind, and live loads of your region
  • Heavy-gauge steel cladding with factory-applied coatings designed for 40+ years of service
  • Proper drainage and ventilation details that prevent moisture accumulation inside the building envelope

When these components are correctly specified and properly assembled, a post frame building has a realistic service life of 40 to 60 years — comparable to or better than conventionally framed structures in agricultural and commercial applications.

Who Uses Post Frame Construction?

Post frame buildings are used across a remarkably wide range of applications:

  • Livestock barns and horse facilities
  • Equipment and implement storage
  • Grain storage and hay barns
  • Workshops and fabrication spaces
  • Commercial warehouses and distribution facilities
  • Retail and light industrial buildings
  • Oversized residential garages
  • Hobby spaces, home gyms, and hobby farms

If you need a large, durable, cost-effective building that goes up fast and performs for decades, post frame is worth your serious consideration.

One of the most common mistakes buyers make when planning a post frame building is underestimating how much space they actually need. It happens consistently: buyers size for today’s needs, build accordingly, and within a few years find themselves planning an addition or wishing they had gone bigger from the start.

This guide gives you a practical framework for selecting the right dimensions — based on your actual intended use, your property constraints, and the way you’ll really use the space.

Standard Post Frame Building Sizes

Post frame buildings are available in virtually any dimension, but most kits are designed around standard size increments. Common widths run in 4-foot increments — 24, 28, 30, 32, 36, 40, 48, 60 feet and wider. Common lengths also run in 4-foot increments starting at 24 feet and extending to 200+ feet for large commercial applications.

The most commonly ordered sizes fall into a few functional categories:

Building Size Square Footage Common Use Cases
24×24 576 sq ft Single or double car garage, small workshop
24×30 720 sq ft 2-car garage with storage, small hobby shop
30×40 1,200 sq ft 3-car garage, small equipment storage
30×48 1,440 sq ft Farm shop, small livestock barn
40×60 2,400 sq ft Equipment barn, 4–6 car garage, workshop
40×80 3,200 sq ft Mid-size livestock or equipment building
50×100 5,000 sq ft Commercial storage, large agricultural
60×120 7,200 sq ft Large-scale agricultural or commercial

Sizing by Use Case
Garage and Vehicle Storage

The standard rule for garages: 12×22 feet per vehicle bay, minimum. But that minimum doesn’t account for doors, storage, workbench space, or the reality that you’ll always want more room than you think.

Practical sizing guidance:

    • 2-car garage: 24×24 minimum, 24×30 preferred

    • 3-car garage: 36×30 minimum, 36×40 preferred

    • 4-car garage or shop with vehicles: 40×40 minimum, 40×60 preferred

If you’re storing trucks, trailers, or RVs, add width. A standard pickup truck with an attached trailer needs a minimum 16-foot width just for the vehicle — clearance and turning room require more.

Workshop or Fabrication Space

Workshops need more space than buyers typically plan for, because once equipment is placed — workbenches, drill press, table saw, welding table, parts storage — usable floor space disappears fast.

    • Solo hobbyist shop: 24×30 minimum

    • Serious home shop: 30×40 to 40×40

    • Small commercial fabrication: 40×60 to 60×80

Plan for 25–30 percent of your total floor area to be consumed by equipment, storage, and circulation before you calculate your actual working space.

Livestock and Agricultural

Livestock buildings have specific space requirements per animal that should drive your size calculation:

    • Horse stalls: 12×12 per horse, plus aisle space (minimum 12 feet wide) and tack/feed storage

    • Cattle: 20–30 sq ft per head for free stall; more for bedded pack

    • Hogs: 8 sq ft per animal

    • Chickens (commercial): 1–2 sq ft per bird in confinement

Add at least 20 percent to your calculated minimum for feed storage, equipment access, and future herd growth.

Equipment and Implement Storage

The most important measurement for equipment storage is door opening height and width — not total square footage. Know the dimensions of your largest equipment before you specify anything else.

Common equipment clearances:

    • Standard tractor with cab: 12–14 feet tall, 10–12 feet wide

    • Combine with header: 12–16 feet tall, requires 20–30 foot door width

    • Semi-truck and trailer: 13.5 feet tall minimum, 60–80 foot turning radius for enclosed backing

Work backward from equipment dimensions to door sizes, then from door sizes to building width and sidewall height.

The Rule Every Buyer Should Know: Build Bigger Than You Think You Need

This is not a sales tactic — it is the near-universal experience of post frame building owners. The incremental cost of going from 40×60 to 40×80 is significantly smaller than the cost of adding an addition later. The cost difference between a 10-foot sidewall and a 14-foot sidewall is a fraction of what it costs to build a second taller building later.

The question to ask is not “how much space do I need right now?” The question is: “How will I use this building in 10 years, and will I regret not having more room?”

Property Constraints to Check Before You Size

Before finalizing dimensions, verify:

    • Setback requirements from your local zoning — how close can you build to property lines, roads, and existing structures?

    • Site topography — does the building footprint fit on flat, usable ground, or will significant grading be required?

    • Septic and utility locations — are there underground systems in the proposed footprint?

    • Easements — does your property have easements that restrict where you can build?

These constraints may force you to adjust size, orientation, or location — better to know before you order than after.

If you’ve been researching ways to add a building to your property, you’ve probably come across the term “post frame.” Maybe you’ve seen it called a pole barn, a kit building, or a post and beam structure. Whatever name you’ve heard, the concept is the same — and for property owners, farmers, homeowners, and growing businesses, post frame building kits represent one of the smartest, most cost-effective ways to build.

This guide breaks down everything you need to know before you buy: what post frame actually means, why kit-based construction has become the preferred choice for rural and commercial buyers alike, and how to make sure you’re getting a building that fits your goals, your property, and your budget.

What Is a Post Frame Building Kit?

A post frame building is a type of structure built around large vertical posts that are embedded into the ground or anchored to a concrete foundation. These posts carry the structural load of the building — which means you don’t need the same elaborate foundation systems required by traditional stick-frame construction.

A post frame building kit takes this construction method and packages it into a pre-engineered, pre-cut set of components that are delivered to your site ready to assemble. A quality kit typically includes:

  • Structural posts (pressure-treated lumber or laminated columns)
  • Roof trusses, engineered to span wide open spaces without interior load-bearing walls
  • Girts and purlins (horizontal framing members for walls and roof)
  • Metal roofing and siding panels
  • Trim, fasteners, and hardware
  • Doors and windows (depending on the kit and supplier)
  • A full set of building plans and assembly instructions

What you’re essentially getting is an engineered building in a box — with everything cut, drilled, and sized to fit together on your site.

Why Post Frame Building Kits Have Become So Popular

Post frame kits have grown dramatically in popularity over the last decade for several concrete reasons.

Speed. Because the components are pre-engineered and pre-cut, the actual build timeline is significantly shorter than traditional construction. A basic post frame structure can often be assembled in days rather than months.

Cost efficiency. Post frame buildings require fewer materials than stick-frame construction and often don’t need a full concrete slab foundation. That translates directly to lower total project costs — sometimes 30 to 50 percent less than a comparable conventionally framed building.

Span capability. One of the most practical advantages is the ability to span large distances without interior columns. A 40×60 post frame building can be completely open inside — no posts in the way of your equipment, animals, or workflow.

Durability. When built with quality materials, post frame buildings are engineered to withstand the wind, snow, and weather loads of your specific region. They’re not temporary structures — they’re long-term assets.

Customization. Modern post frame kits can be configured for nearly any use: garages, workshops, livestock barns, commercial storage, equipment sheds, hobby spaces, or even residential applications.

Who Should Buy a Post Frame Building Kit?

Post frame building kits are ideal for a wide range of buyers:

  • Farmers and agricultural operators who need reliable, large-span buildings for livestock, grain storage, or equipment
  • Rural property owners adding a garage, workshop, or storage building
  • Small businesses looking for affordable commercial space without a massive construction investment
  • Contractors and builders who want a dependable, fast-to-assemble kit for their clients
  • Homeowners who want a detached shop, hobby space, or oversized garage

If your goal is a building that is practical, durable, and built to last without overcomplicating the process, a post frame kit is likely the right direction.

Kit vs. Turnkey: Understanding the Difference

When you buy a post frame kit, you’re purchasing the materials and engineered plans. Assembly is either DIY or contracted to a local builder. This is different from a “turnkey” post frame build, where a company sells you the completed structure.

Kits cost less upfront and give you more control over who builds, when, and how. Turnkey builds simplify project management but typically cost significantly more. For buyers who want the best value and are willing to coordinate a local crew or builder, kits almost always win on cost.

What to Look for in a Post Frame Building Kit Supplier

Not all kits are the same. Here’s what separates a quality kit supplier from a commodity one:

  • Engineered plans included. Your kit should come with stamped, engineer-approved drawings that meet local building codes.
  • Pre-cut components. Quality kits include lumber cut to length, not raw material you have to cut yourself.
  • Material transparency. You should know exactly what grade of lumber, what gauge of metal, and what fastener specs are included before you buy.
  • Support and guidance. A good supplier answers your questions, helps you understand the assembly process, and is reachable when issues come up.
  • Customization options. Your kit should be configurable to your actual dimensions, use case, and site conditions — not a one-size-fits-all box.

How to Get Started

The best first step is to define your project clearly before you call anyone. Know your approximate size, your intended use, whether you need concrete work done separately, and what your realistic budget is. The more clearly you can define your needs, the faster a quality supplier can match you to the right kit.

At Country Building Co, we help buyers work through exactly this process — not because we want to sell you something, but because the right building starts with the right questions. If you’re not sure where to start, our team is here to help you figure it out before you commit to anything.

Most post frame building mistakes aren’t made on the job site. They’re made in the planning phase — in the weeks before a kit is ordered, when assumptions go unchecked and details get glossed over in the excitement of moving forward on a project.

The good news is that every mistake on this list is preventable. None of them require special expertise to avoid — they just require knowing what to watch for before you commit. Here are the most common and costly mistakes first-time post frame buyers make, and exactly how to avoid each one.


Mistake 1: Sizing the Building for Today Instead of Tomorrow

This is the single most common regret among post frame building owners. A buyer calculates how much space they currently need, orders accordingly, builds a 30×40, and spends the next decade wishing they had built a 40×60.

The incremental cost of going bigger during the initial build is always dramatically lower than the cost of adding on later. Adding a lean-to or an extension requires re-engineering, additional permits, disruption to the existing structure, and contractor mobilization costs that you already paid once.

The fix: Size for how you’ll use the building in 10 years, not how you’ll use it today. Add at least one size increment to whatever feels right — if 30×40 seems correct, price out 40×60. The difference is often smaller than buyers expect, and the long-term value is almost always worth it.


Mistake 2: Skipping the Permit Process (or Starting Too Late)

Some buyers skip permits because they assume their rural property doesn’t require them, or because they want to move faster than the permitting timeline allows. Others start the permit process after ordering — then discover a two-month review queue they didn’t account for.

Both approaches create problems. Unpermitted buildings can complicate property sales, create insurance issues, and in some jurisdictions result in stop-work orders or required demolition. Starting the permit process late pushes every other phase of the project back.

The fix: Contact your local building department before you order anything. Ask what’s required, get the application started the moment your engineered plans are ready, and treat permitting as Phase 1 — not an afterthought.


Mistake 3: Not Verifying What the Quote Actually Includes

Post frame kit pricing is not standardized. One supplier’s “$18,000 kit” may include engineer-stamped plans, all trim, and delivery. Another supplier’s “$15,000 kit” may include bare structural components and nothing else. Buyers who compare headline prices without comparing what’s in them routinely end up paying more than they expected — or more than the competitor they passed on.

The fix: Request a fully itemized quote from every supplier. Compare total landed cost — kit, options, engineering, delivery, and applicable tax — not the base price. Ask specifically: What gauge is the metal? Are doors and trim in this price?


Mistake 4: Underestimating Total Project Cost

A post frame kit is not a complete building — it’s materials. Total project cost includes site preparation, excavation, concrete work, labor for assembly, permit fees, and any interior finishing. Buyers who budget only for the kit cost consistently come up short when the full project bill arrives.

The fix: Budget for all five cost categories from the beginning: kit, site prep and grading, foundation/concrete, labor, and permits. For a complete, assembled 40×60 building, a realistic total project budget is typically 2.0 to 2.5 times the kit cost alone.


Mistake 5: Choosing the Lowest Bid Without Checking Specifications

Price shopping is sensible. Choosing the lowest bid without verifying what you’re actually getting is not. Lower-cost kits frequently use thinner metal (29-gauge instead of 26-gauge), lighter lumber, wider truss spacing, or skip components that affect the building’s longevity and performance.

A kit that saves $3,000 upfront but uses substandard metal will cost you more in repairs, replacements, and reduced building life over the next 30 years.

The fix: When comparing quotes, confirm that you’re comparing equivalent specifications. Panel gauge, post size, truss design loads, and inclusion of engineered plans should all match before you compare prices. If they don’t match, adjust accordingly — or ask the lower-cost supplier to explain why their specs differ.


Mistake 6: Ignoring Drainage Until It’s Too Late

Water is the long-term enemy of any building, and post frame buildings are not immune. Buyers who don’t address site drainage during the planning phase frequently discover standing water around their building, mud at entries, and — in the worst cases — moisture problems affecting posts and the base of wall panels.

Fixing drainage after a building is up is difficult and expensive. Fixing it before the building goes up is straightforward and cheap.

The fix: During site prep, confirm that your grading slopes away from the building on all sides. Plan for gutters and downspouts to be installed at the time of construction. If you’re in an area with high groundwater or heavy clay soils, consider perimeter drain tile around the building footprint.


Mistake 7: Not Lining Up a Contractor Before the Kit Is Ordered

A post frame building kit sitting in a pile of material on your property while you scramble to find an available crew is more common than it should be. In active construction markets, experienced post frame crews can be booked 4 to 8 weeks out. Buyers who order their kit and then start looking for a contractor often face a gap between delivery and assembly that creates storage, security, and scheduling headaches.

The fix: Start looking for and vetting local post frame contractors the same week you request your kit quote. You don’t need to book a crew before the kit is ordered, but you should have a contractor confirmed — with a tentative start date — before you finalize the order.


Mistake 8: Forgetting About Sidewall Height

Floor square footage gets all the attention, but sidewall height is equally important for how usable your building actually is. A 40×60 building with a 10-foot sidewall won’t fit a tractor with a cab, a large trailer, or an RV. A building designed for equipment access but specced with a residential garage wall height is a frustrating limitation you’ll live with for decades.

The fix: Know the height of your tallest vehicle or piece of equipment before you specify sidewall height. Add 24 to 36 inches of clearance above that height for safe, practical operation. Common functional sidewall heights:

    • Standard vehicles and trucks: 12 feet minimum

    • Tractors with cabs: 14 feet minimum

    • Large ag equipment and combines: 16 feet minimum

    • Semi-trucks: 16 feet minimum


Mistake 9: Treating the Kit Supplier as Just a Parts Vendor

Some buyers treat the kit ordering process like buying lumber at a hardware store — show up, place the order, take the materials. What they miss is that a quality post frame kit supplier has seen hundreds of projects like yours and can identify problems with your plan before they become expensive realities.

Buyers who don’t ask questions and don’t share the full context of their project — site conditions, intended use, local weather, future expansion plans — miss the opportunity to catch specification errors before the kit ships.

The fix: Treat your kit supplier like a partner, not a vendor. Share your site plan, your intended use, your local conditions, and your long-term goals. Ask for their recommendations on size, sidewall height, door placement, and ventilation. A good supplier will give you honest answers that make your building better.


Mistake 10: Not Thinking About Ventilation

Ventilation is almost always an afterthought for first-time post frame buyers — and an expensive one. Buildings used for livestock develop significant moisture and ammonia from animals. Equipment storage buildings accumulate condensation, especially with temperature swings. Workshops and hobby spaces get hot in summer without airflow.

A building without adequate ventilation is uncomfortable to work in, accelerates corrosion of metal components, and creates health problems for animals. Retrofitting ventilation after a building is complete is awkward and expensive.

The fix: Plan your ventilation at the design stage. Ridge vents, sidewall vents, cupolas, and exhaust fans are all relatively inexpensive when incorporated into the original kit specification. Know what your building will be used for, consult your supplier on minimum ventilation requirements for that use, and spec it into the original order.


Last Word

Every mistake on this list has been made by real buyers — and every one of them was preventable with a little more planning and the right information at the right time. Post frame buildings are one of the best investments a property owner, farmer, or business operator can make. Getting the planning right is what turns a good investment into a great one.

At Country Building Co, we’ve helped buyers through every one of these scenarios. If you’re early in the planning process and want to talk through your project before you commit to anything, that’s exactly what we’re here for. The right conversation early is worth far more than the best kit quote later.
our team + Island Landings Storage: Award‑Winning Custom Storage Condos With Bold Metal Colors

We look back several years to examine how a successful and unique partnership has turned out

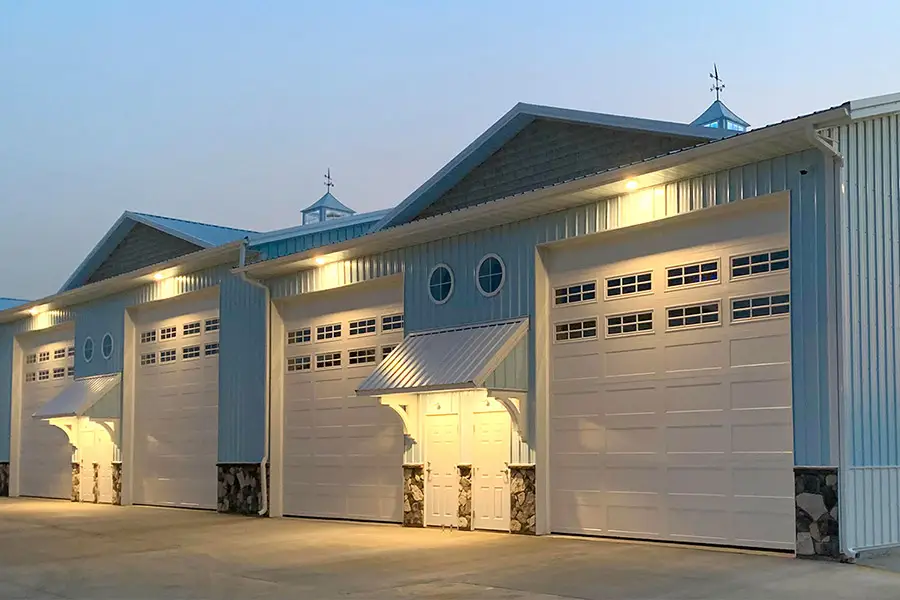
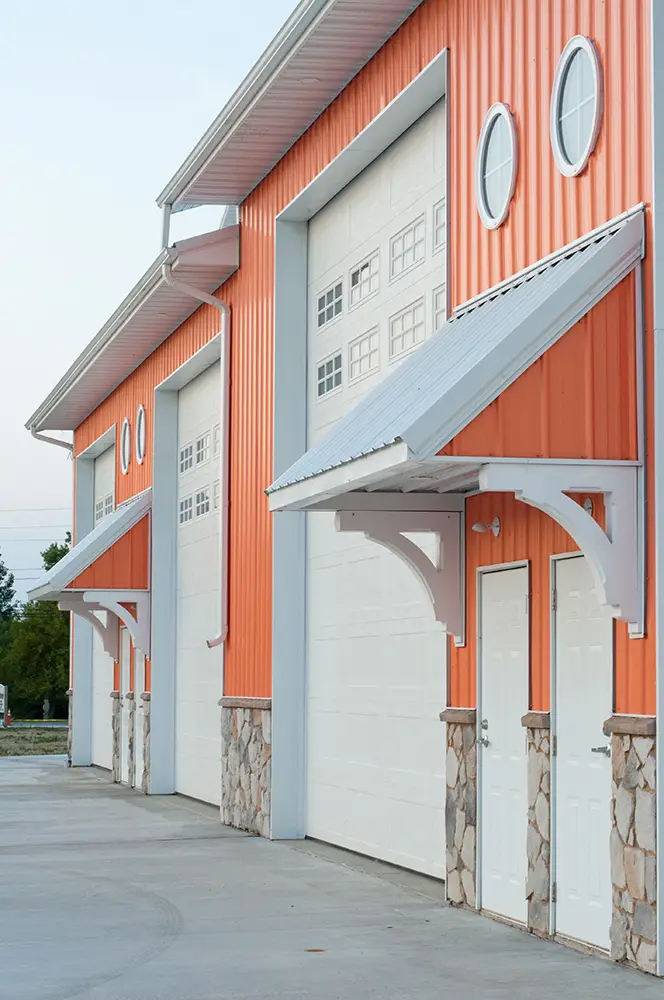
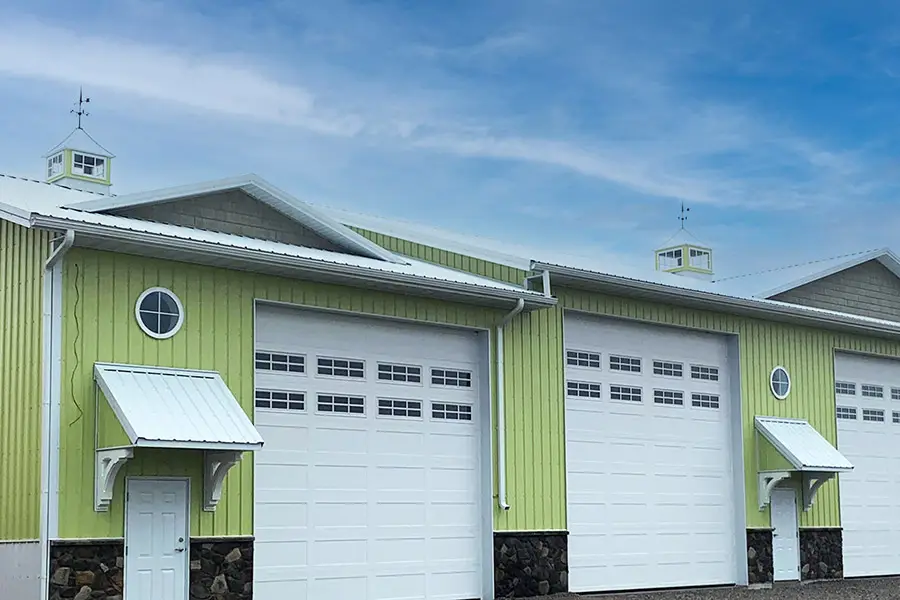
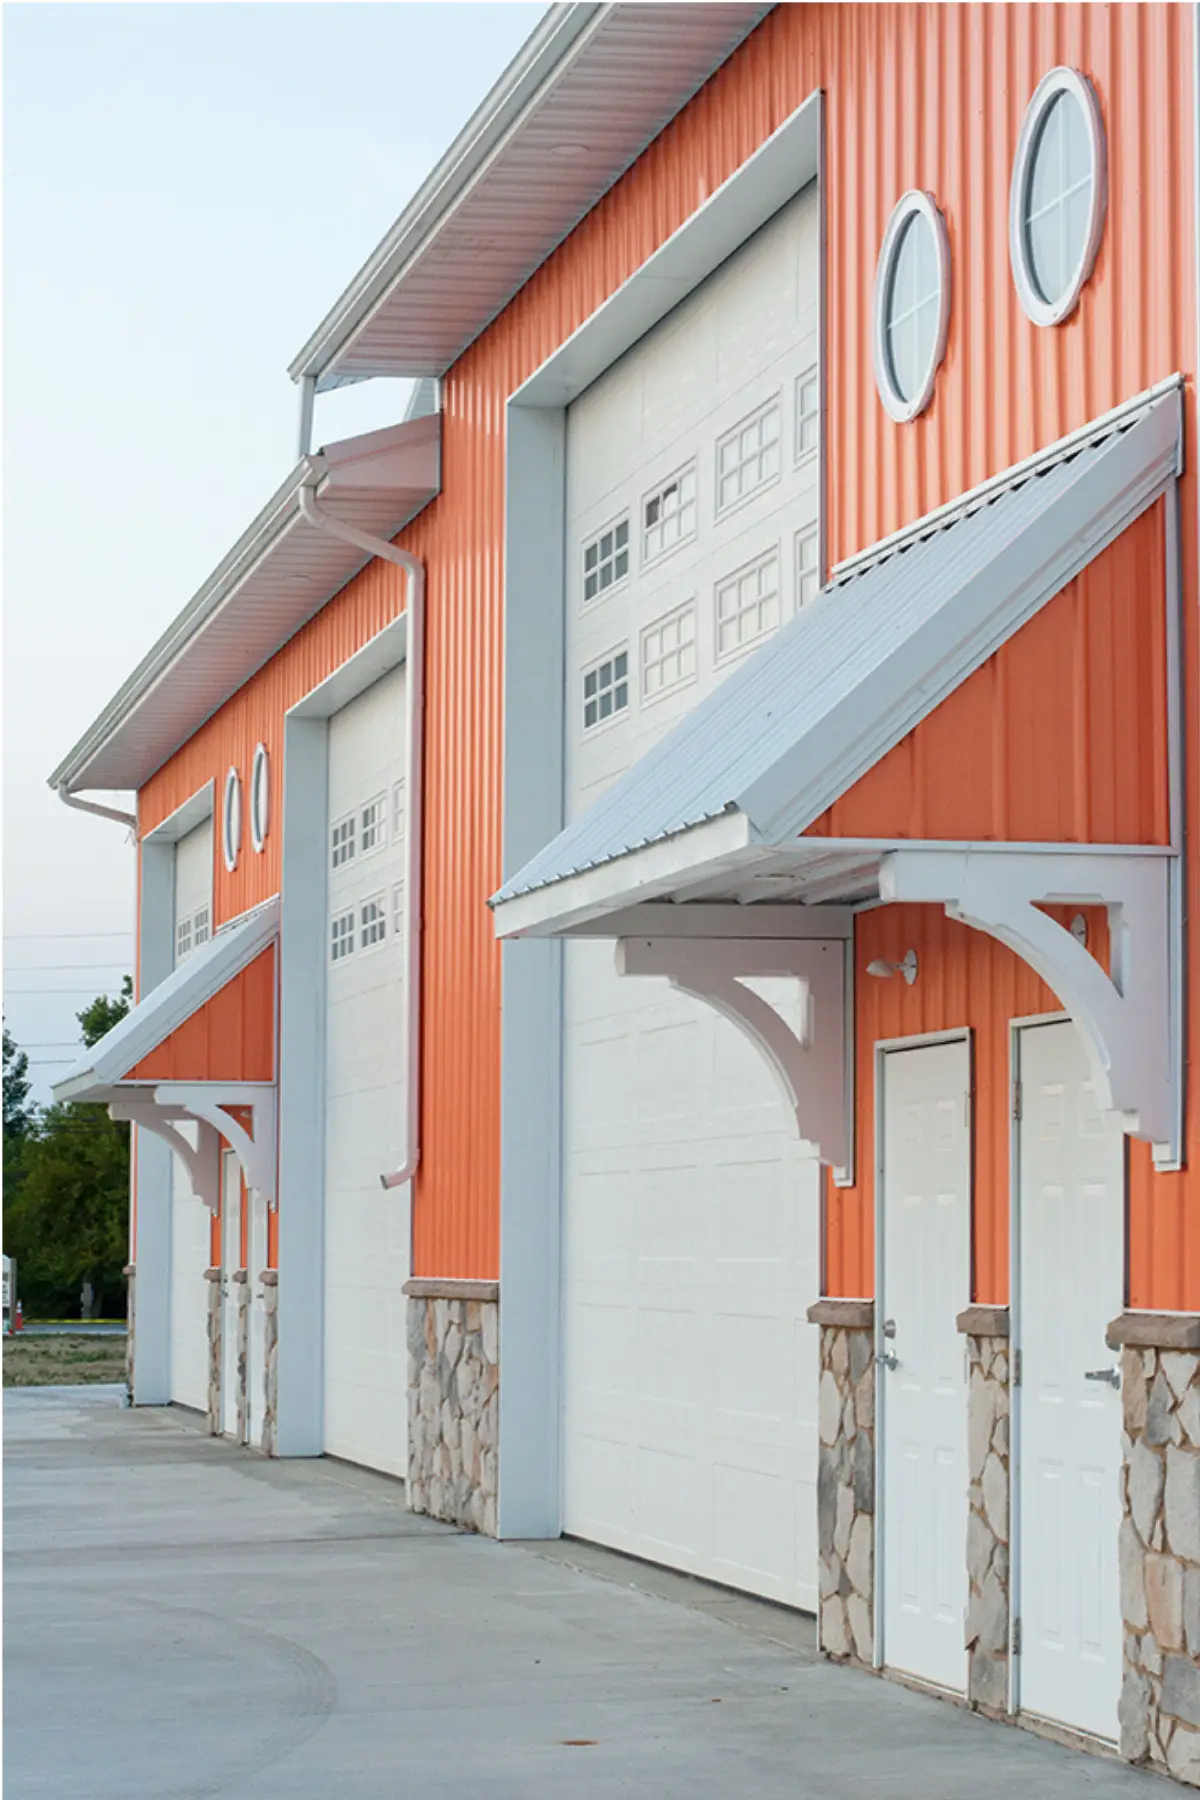
Country Building Co partnered with Island Landings Storage to turn a simple “boat and RV storage” idea into an award‑winning, coastal‑inspired storage condo community that looks nothing like a typical metal building.

A Vision For Storage That Didn’t Look Like Storage

When the Island Landings team started planning their Port Clinton, Ohio business and storage condos, they knew they didn’t want rows of anonymous beige boxes. They wanted a place that felt upscale and coastal, something that would appeal to boat, RV, and car owners who care about where they store their investments.

That’s where Country Building Co came in. Drawing on decades of post‑frame design and metal exteriors experience, our team helped transform that vision into a multi‑building, master‑planned development with bright colors, coastal detailing, and serious performance under the skin.

Designing A Master Plan, Not Just A Single Building

Instead of treating Island Landings as a one‑off project, our designers approached it like a campus.
Early renderings laid out multiple post‑frame structures flanking a central drive aisle, with each phase using coordinated colors, rooflines, and cupolas so later buildings would feel intentional—not “added on.”

That long‑range planning paid off. Over several years, Country Building Co helped Island Landings roll out multiple buildings in a variety of unit sizes, including popular 30′ x 50′ business and storage condos designed for boats, RVs, and hobby spaces.
 Because the site is zoned commercial and configured for business build‑outs, every structural decision—from spans to door heights—was made with future flexibility in mind.

Custom Metal Colors That Created A Brand, Not Just A Building

If you drive past Island Landings today, the first thing you notice isn’t the size of the doors—it’s the color.
Country Building Co sourced custom Parallel Rib metal panel profiles in bold, coastal hues: bright citrus greens, vivid oranges, and soft marina blues, all paired with crisp white trim and accents.

Those color choices weren’t just aesthetic; they became part of the Island Landings brand.
The coastal palette ties directly into Port Clinton’s Lake Erie boating culture, while the vertical Parallel Rib exterior emphasizes height and rhythm along the drive aisle, making each building read more like a boutique marina facility than a storage row.

Parallel Rib Panels And Stone Details For Curb Appeal And Durability

Country Building Co specified 40‑year, maintenance‑free 29‑gauge steel panels inside and out to give the development long‑term durability in a demanding lakefront environment.
 On the exterior, the Parallel Rib siding is combined with stone wainscoting, tall overhead doors, and distinctive round accent windows to create a look that’s both upscale and highly functional for large vehicles.

The Parallel Rib profile does double duty: its vertical lines visually stretch the walls, and its structural shape adds stiffness to the wall system, helping the post‑frame shell stand up to wind, lake‑effect weather, and years of use.

Because Country Building Co understands how panel profile, gauge, and fastening all interact with the framing package, the team was able to optimize fastening patterns and trims so the buildings stay tight and watertight while still looking clean up close.

Bright, Clean Interiors With Steel Liner Panel

On the inside, Country Building Co used white steel interior liner panel to create bright, low‑maintenance spaces that are easy to customize.
 The reflective finish of the liner panel works with abundant high windows, LED lighting, and ceiling fans to keep units feeling open and well‑lit, even when they are packed with boats, RVs, or vehicle collections.

Because the liner panel is also 29‑gauge steel, owners get walls and ceilings that resist dents, scuffs, and moisture better than gypsum or OSB—an important advantage in spaces that see constant movement of trailers, tools, and equipment. 
Integrated floor drains, high R‑value insulation, and powered overhead doors complete a package that is as functional as it is attractive.

Post‑Frame Expertise In Every Phase Of Construction

These buildings are more than pretty shells—they are high‑performance post‑frame structures engineered to handle heavy snow loads, wind exposure, and large door openings.
Country Building Co’s design team detailed the laminated posts, truss spacing, and purlin layout to support long clear‑spans, tall sidewalls, and wide overhead door headers without compromising structural integrity.

That engineering detail shows up in the field. As units were framed and sheathed over multiple phases, the layout supported clean expansion, consistent roof planes, and precise alignment of canopies, man doors, and overhead doors from building to building.

The result is a campus that feels like a single cohesive development, not a patchwork of different projects.

Custom Cupolas: The Detail That Ties It All Together

One of the most recognizable elements at Island Landings is the row of lighted cupolas sitting proudly on each main ridge.
Country Building Co worked closely with Island Landings and our suppliers to design custom cupolas that match the building body color—right down to the citrus green and marina blue trims—rather than relying on an off‑the‑shelf white accent.

Those custom cupolas, complete with windows and weather vanes, are more than decorative.
They reinforce the “coastal condo” aesthetic promised in Island Landings’ marketing—stone fronts, coastal colors, and lighted cupolas are highlighted as signature features—and help the project stand out in a crowded storage market.

A True Team Effort: Old State Construction And Jason Zimmerman

Design is only half the story; execution is what makes a metal building project truly successful.
Old State Construction, a longtime Country Building Co partner, served as the builder and installer on the Island Landings project, bringing Amish craftsmanship and meticulous attention to detail to every frame, panel, and trim piece.

Project lead Jason Zimmerman from Country Building Co guided the design from concept through completion, coordinating color selections, panel profiles, structural details, and those custom cupolas that became the visual signature of the site.

Jason’s ability to translate Island Landings’ “store your toys in style” vision into buildable, repeatable post‑frame designs allowed the ownership team to expand over several years while keeping costs controlled and aesthetics consistent.

Recognized Quality: Award‑Winning Commercial Facility

The combination of smart post‑frame engineering, custom metal exteriors, and high‑end interior finishes has not gone unnoticed.
Island Landings received a Buckeye Building Award in 2018 for Commercial Facility over 5,000 square feet, recognition that underscores the quality of both the design and execution.

That award is a testament to what can happen when an owner with a bold idea teams up with a design‑driven metal building supplier and a trusted construction partner.
For Island Landings, the result is an investment‑grade property that functions like serious storage—but looks and feels like part of the Lake Erie resort experience.


Building Your Own One‑Of‑A‑Kind Storage Concept

If you’re dreaming about a storage or business‑condo project that does more than check a box on square footage, Country Building Co can help you do what Island Landings did:

  • Use custom Parallel Rib colors to turn buildings into a recognizable brand.

  • Combine post‑frame engineering with 40‑year steel and interior liner panel for durability and low maintenance.

  • Integrate details like stone fronts, canopies, and custom cupolas that make metal buildings feel anything but ordinary.

From first sketch to final cupola, our team—and partners like Old State Construction—know how to design and deliver metal building projects that stand out on the road and perform for decades in the field.

Share the Post:

Related Posts

One of the most common questions buyers ask before committing to a post frame building project is simple: How long is this actually going to take? It’s a fair question — and the honest answer depends on several factors that are worth understanding before you start planning.

This post breaks down the full timeline from decision to finished building, organized by phase and scaled to common building sizes.

The Five Phases of a Pole Barn Project

A post frame building project doesn’t start when the crew shows up — it starts weeks or months earlier. Here’s a realistic look at each phase:

Phase 1: Design and Ordering (1–4 Weeks)

Once you’ve decided on a building size, use, and specifications, you’ll work with your supplier to configure the kit. This phase includes:

  • Finalizing dimensions and options
  • Reviewing and approving the engineered plan set
  • Submitting the purchase order and deposit

A straightforward kit order with standard specifications can be finalized in a few days. More complex configurations — unusual sizes, multiple door openings, specialty components — may take a few weeks of back-and-forth.

Phase 2: Permitting (1 Week to 3 Months)

This is the most variable phase in the entire project timeline. Permit processing times depend entirely on your local building department.

  • Rural counties with light permit loads: 1–3 weeks
  • Suburban counties with heavier permit loads: 4–8 weeks
  • Areas with complex zoning review: 2–4 months

If you’re in a jurisdiction with a long permit review process, starting your permit application as soon as your engineered plans are ready — before your kit is even manufactured — is the smartest way to protect your timeline.

Phase 3: Manufacturing and Delivery (2–6 Weeks)

Once your order is placed, your kit goes into the supplier’s production queue. Standard lead times for post frame kits run 3–6 weeks from order to delivery, depending on the supplier’s current volume and the complexity of your kit.

Delivery logistics — coordinating freight, scheduling the delivery date, ensuring site access for a flatbed truck — typically add a few days to a week to this phase.

Phase 4: Site Preparation (1–5 Days)

Before your kit arrives (or immediately after), your site needs to be prepared. Site prep includes:

  • Clearing and grading the building footprint
  • Marking post locations
  • Excavating post holes or setting concrete piers
  • Establishing material staging areas

For a flat, cleared site with easy access, a small excavating crew can complete site prep in one to two days. Heavily wooded, sloped, or wet sites may require significantly more time.

Phase 5: Assembly (2 Days to 2 Weeks)

The actual building assembly is often the fastest phase — which surprises buyers who imagine a complicated multi-week construction process.

Building Size Experienced Crew (4–6 people) Smaller Crew or Owner-Assisted
24×30 2–3 days 4–7 days
30×40 3–4 days 5–10 days
40×60 4–6 days 7–14 days
60×80 7–10 days 12–20 days
60×120 10–14 days 18–28 days

These timelines assume no significant weather delays, a complete and accurate kit, and a reasonably prepared site.

Realistic Total Timelines from Start to Finish

Adding all phases together:

Scenario Realistic Total Timeline
Rural location, fast permit county, experienced crew 6–10 weeks
Suburban location, average permit timeline, local crew 10–16 weeks
Complex permit jurisdiction, custom kit, smaller crew 4–6 months

The most important takeaway: permitting is the wild card. Buyers who don’t start the permit process early are almost always the ones whose projects get delayed.

What Slows Projects Down

Beyond permit delays, the most common causes of extended timelines are:

Material shortages or substitutions. Supply chain disruptions — still a reality in the building materials industry — can affect lead times on specific components. Working with a supplier who is transparent about current lead times protects you from surprises.

Site access issues. If your delivery truck can’t reach the site or the site isn’t prepared when the kit arrives, you lose days coordinating a re-delivery or storing materials off-site.

Contractor scheduling. In high-demand markets, experienced post frame crews may be booked 4–8 weeks out. Lining up your contractor before your kit is ordered — not after it arrives — keeps the schedule intact.

Weather. No build schedule is immune to weather. Plan for at least one weather delay of 1–3 days for projects in spring or fall.

How to Protect Your Timeline

The buyers who finish on schedule are the ones who treat permitting and contractor scheduling as Day 1 priorities — not afterthoughts. Start your permit application the moment your engineered plans are ready. Call contractors before you order. Confirm your site access is ready for a flatbed delivery. These aren’t complicated steps, but skipping them is the #1 reason post frame projects run behind schedule.

7 Reasons Elite Batten Is the Strongest Siding for Post-Frame

1. Installation Speed = Massive Labor SavingsElite Batten installs in approximately 50% less time than traditional 10” board-and-batten panels. For post-frame contractors and builders, this translates to lower labor costs, faster project completion, reduced weather exposure risk during installation, and the ability to bid more projects with the same crew. The snap-on design eliminates the hassle of measuring and fastening individual battens, ensuring consistent spacing and uniform appearance across the entire wall.

2. Post-Frame Durability That Matches the StructurePost-frame buildings are engineered for longevity—Elite Batten matches that with superiority over wood, vinyl, and fiber cement. Steel panels like Elite Batten shed water instantly and don’t absorb moisture, swell, warp, or rot—ever. This is critical for post-frame buildings where the wall cavity is exposed and moisture intrusion can cause major issues. Additionally, it's termite/mold resistant, holds up to hail and knocks, and is non-combustible.

3. Hidden Fasteners = No Rust, No Backing OutTraditional exposed-fastener panels require screws that can rust over time, back out due to thermal expansion, and create leak points. Elite Batten’s hidden fastener batten system covers all attachment points, eliminating rust concerns and maintaining a clean vertical appearance.

4. 50+ Year Longevity with Minimal MaintenanceMetal board-and-batten siding delivers 50+ years of performance with minimal upkeep. Compare that to wood siding, which may need major work every 15–20 years. Elite Batten’s premium 26 GA steel (thicker than typical 28 or 29 GA panels) provides increased quality and performance over time, with factory-applied coatings that resist fading, hail, and weather degradation.

5. Energy Efficiency & Insurance BenefitsElite Batten delivers multiple financial advantages: reflective properties keep buildings cooler in summer, reducing AC strain and lowering energy bills when paired with proper insulation. Fire-resistant siding can save up to 20% on homeowners insurance, and in wildfire-prone areas, non-combustible siding is becoming a necessity.

6. Modern Aesthetics That Elevate Post-FramePost-frame buildings often have a “pole barn” look. Elite Batten transforms that into residential-quality curb appeal with bold vertical lines that create a clean, contemporary look, woodgrain finishes that replicate authentic board-and-batten wood texture, and a library of popular colors and textures that match any architectural style. It's perfect for barndominiums, farmhouse designs, and modern agricultural buildings.

7. Sustainability & Lifecycle ValueElite Batten embodies sustainable building principles: it's 100% recyclable (often manufactured with recycled steel), creates no landfill waste every 15–20 years like wood/vinyl, offers LEED credits for sustainability, and provides better lifecycle value than vinyl or fiber cement. For builders and owners prioritizing green construction, metal board-and-batten is the intelligent choice.