Post Frame Building Site Prep: How to Prepare Your Land Before the Kit Arrives

Site preparation is the unglamorous part of a post frame building project — the phase that doesn’t make it into brochures or Instagram posts. But how well you prepare your site directly determines how smooth your build goes, how long your building lasts, and whether you end up with unexpected costs after the kit arrives.

Get site prep right and the rest of the project runs on schedule. Get it wrong and you’re dealing with re-scheduling, mud, drainage problems, or structural issues that are expensive to fix after the fact.

Step 1: Choose and Confirm Your Building Location

Before any ground is disturbed, confirm that your intended building location is viable. Verify:

Setback compliance. Contact your local building department or zoning office and confirm the required setback distances from property lines, roads, neighboring structures, and any right-of-ways. Placing a building too close to a property line can require costly relocation or result in permit denial.

Underground utilities. Before any digging, call 811 (the national dig-safe hotline in the US). This triggers a utility locating service that will mark gas lines, water lines, electrical conduits, and other buried utilities on your property. This is not optional — it is legally required in most states and is a critical safety step.

Soil conditions. If you’re unsure about soil bearing capacity on your site — particularly on sloped land, near wet areas, or in regions with expansive clay soils — a brief consultation with a local excavating contractor or soils engineer can save you from foundation problems later.

Site access. Confirm that a flatbed semi-truck can reach your building site. Your kit will be delivered on a large trailer that needs a firm, passable access road. If your site is at the end of a soft lane or requires passing through soft ground, plan for temporary road improvements or alternative offload locations.

Step 2: Clear and Grade the Footprint

Once location is confirmed, prepare the building footprint:

Clearing. Remove all vegetation, trees, stumps, and debris from the building footprint plus a working perimeter of at least 10 feet on all sides. Stumps and organic material left under a building decompose over time, creating settling and drainage issues.

Grading. The building footprint should be graded level or with a slight positive slope away from the building on all sides (minimum 5% slope for 6 feet from the building). This ensures water drains away from the foundation rather than pooling under or around the building.

Topsoil removal. For the building footprint itself, strip and remove the topsoil layer (typically 4–8 inches). Topsoil is organic material that compresses and decomposes — you don’t want it under your posts or concrete.

Compaction. After rough grading and topsoil removal, compact the subgrade using a plate compactor or roller. If you’re on sandy or loose soils, a layer of compacted crushed stone or gravel under the floor area adds stability and drainage.

Step 3: Handle Drainage Before You Build

Water management is one of the most important long-term factors in a post frame building’s performance. Address drainage at the site prep stage — not after the building is up.

Surface drainage. Confirm that your grading directs water away from the building on all sides. Low spots adjacent to the building will cause standing water that accelerates post decay and creates mud and ice problems at entries.

Subsurface drainage. In areas with high water tables or poorly draining soils, perimeter drain tile around the building footprint — a perforated pipe in a gravel trench that redirects groundwater away from the building — is a meaningful investment.

Gutters and downspouts. While not part of site prep, plan for gutters and downspouts at the design stage. Roof runoff concentrated at the building perimeter without gutters will erode soil and wet the area adjacent to your posts.

Step 4: Set Post Locations

Using your engineered building plans, lay out the exact post locations across the building footprint. This is done with stakes, string lines, and a tape measure — the goal is to mark each post location accurately before any excavation begins.

Accuracy at this stage matters. Post locations that are out of square or incorrectly spaced will cause problems during truss setting and panel installation that are difficult to correct once posts are set.

Step 5: Excavate Post Holes or Prepare the Foundation

Post frame buildings use one of several foundation approaches:

Direct burial. Posts are set in excavated holes and backfilled with concrete. This is the most common and economical approach for agricultural and storage buildings. Hole depth depends on local frost depth — in most of the Midwest, 4–5 feet is standard.

Concrete piers. Concrete is poured into the hole first, then the post is set on top of the cured pier with a post base connector. This keeps the post itself out of direct ground contact.

Perimeter concrete wall. For buildings requiring a full concrete floor slab, a continuous perimeter wall or turned-down slab edge is often used, with posts anchored to the slab or wall. This approach is more expensive but provides a clean, durable floor solution.

Your engineered plans will specify which foundation approach is designed for your building. Do not deviate from the engineered specification without consulting the engineer.

What to Do Before the Delivery Truck Arrives

The day your kit is scheduled to arrive, your site should have:

  • A clear, firm access path for a semi-truck
  • A designated material staging area on firm, level ground
  • Post holes excavated (or ready to excavate)
  • All utilities located and marked
  • Grading and drainage work complete

Having these items ready means the delivery goes smoothly and your crew can start building the same day the kit arrives.
Why Metal Roofing Makes Sense for Roofing & Post-Frame Projects

1. Durability That Matches Post-Frame Construction

Post-frame buildings (barndominiums, agricultural structures, commercial sheds) are built for longevity. Metal roofing complements that with:

  • Superior resistance to weather, wind, and impactyoutube
  • Sherwin-Williams coil coatings with 40-year color guaranteesyoutube
  • Proven performance in high-wind and extreme weather regionsmetalroofingsystems

Metal won’t Automatically lose functionality if dentedin contrast to shingles that crack or tear.

2. Lower Lifetime Cost

While metal roofing has a higher upfront cost, its lifetime cost is often lower:

  • One installation vs. 2–3 shingle replacements
  • No recurring disposal fees
  • Reduced maintenance and repair costsyoutube
  • Insurance benefits: Many insurers prefer metal due to fire and wind resistanceyoutube

3. Energy Efficiency & Climate Performance

Metal roofs reflect solar heat, reducing cooling costs in hot climates. With reflective coatings, they can significantly lower energy bills. In cold climates, snow sheds more easily, reducing ice dam risk.metalroofingsystems

4. Fire Safety & Insurance Advantages

Metal roofing is:

  • Class A fire-ratedyoutube
  • Non-combustible compared to asphalt
  • More likely to be favored by insurance companiesyoutube

This is especially critical in wildfire-prone areas or where controlled burns occur.

5. Sustainability That Matters

Choosing metal means:

  • No landfill waste every 15–25 years
  • Recyclable at end of lifeyoutube
  • Can remain on the building indefinitelyyoutube

For post-frame builders and homeowners prioritizing sustainable building, metal is a clear winner.

When Metal Roofing Is the Smarter Choice

Metal roofing makes more sense than replacing shingles again when:

  • Your roof is over 15 years old and has needed multiple repairs
  • You’re planning to own the property 20+ years
  • You’re building or retrofitting a post-frame structure
  • You live in a high-wind, wildfire, or extreme weather regionmetalroofingsystems
  • You want to reduce long-term maintenance and energy costs
  • You care about sustainability and reducing landfill waste

our team + Island Landings Storage: Award‑Winning Custom Storage Condos With Bold Metal Colors

We look back several years to examine how a successful and unique partnership has turned out

Country Building Co partnered with Island Landings Storage to turn a simple “boat and RV storage” idea into an award‑winning, coastal‑inspired storage condo community that looks nothing like a typical metal building.

A Vision For Storage That Didn’t Look Like Storage

When the Island Landings team started planning their Port Clinton, Ohio business and storage condos, they knew they didn’t want rows of anonymous beige boxes. They wanted a place that felt upscale and coastal, something that would appeal to boat, RV, and car owners who care about where they store their investments.

That’s where Country Building Co came in. Drawing on decades of post‑frame design and metal exteriors experience, our team helped transform that vision into a multi‑building, master‑planned development with bright colors, coastal detailing, and serious performance under the skin.

Designing A Master Plan, Not Just A Single Building

Instead of treating Island Landings as a one‑off project, our designers approached it like a campus.
Early renderings laid out multiple post‑frame structures flanking a central drive aisle, with each phase using coordinated colors, rooflines, and cupolas so later buildings would feel intentional—not “added on.”

That long‑range planning paid off. Over several years, Country Building Co helped Island Landings roll out multiple buildings in a variety of unit sizes, including popular 30′ x 50′ business and storage condos designed for boats, RVs, and hobby spaces.
 Because the site is zoned commercial and configured for business build‑outs, every structural decision—from spans to door heights—was made with future flexibility in mind.

Custom Metal Colors That Created A Brand, Not Just A Building

If you drive past Island Landings today, the first thing you notice isn’t the size of the doors—it’s the color.
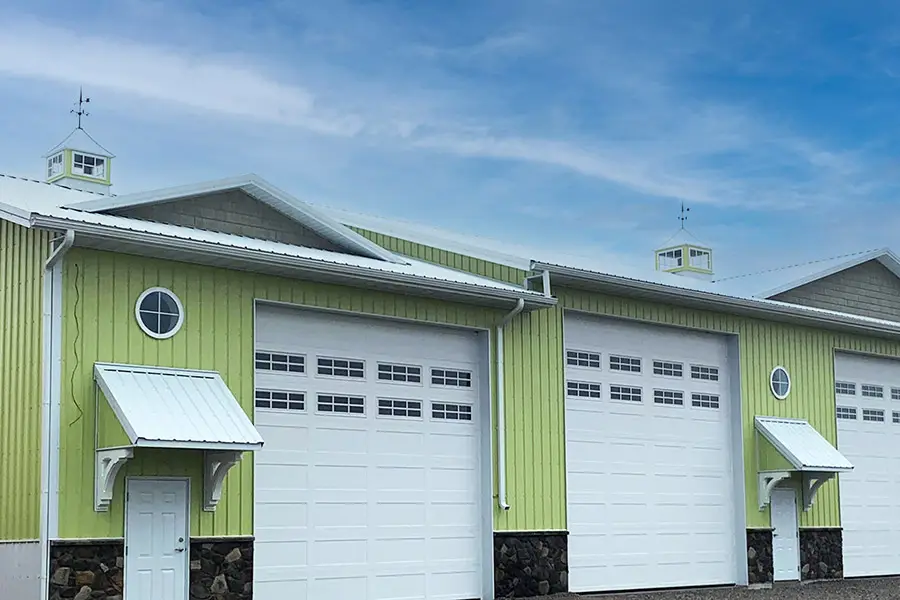
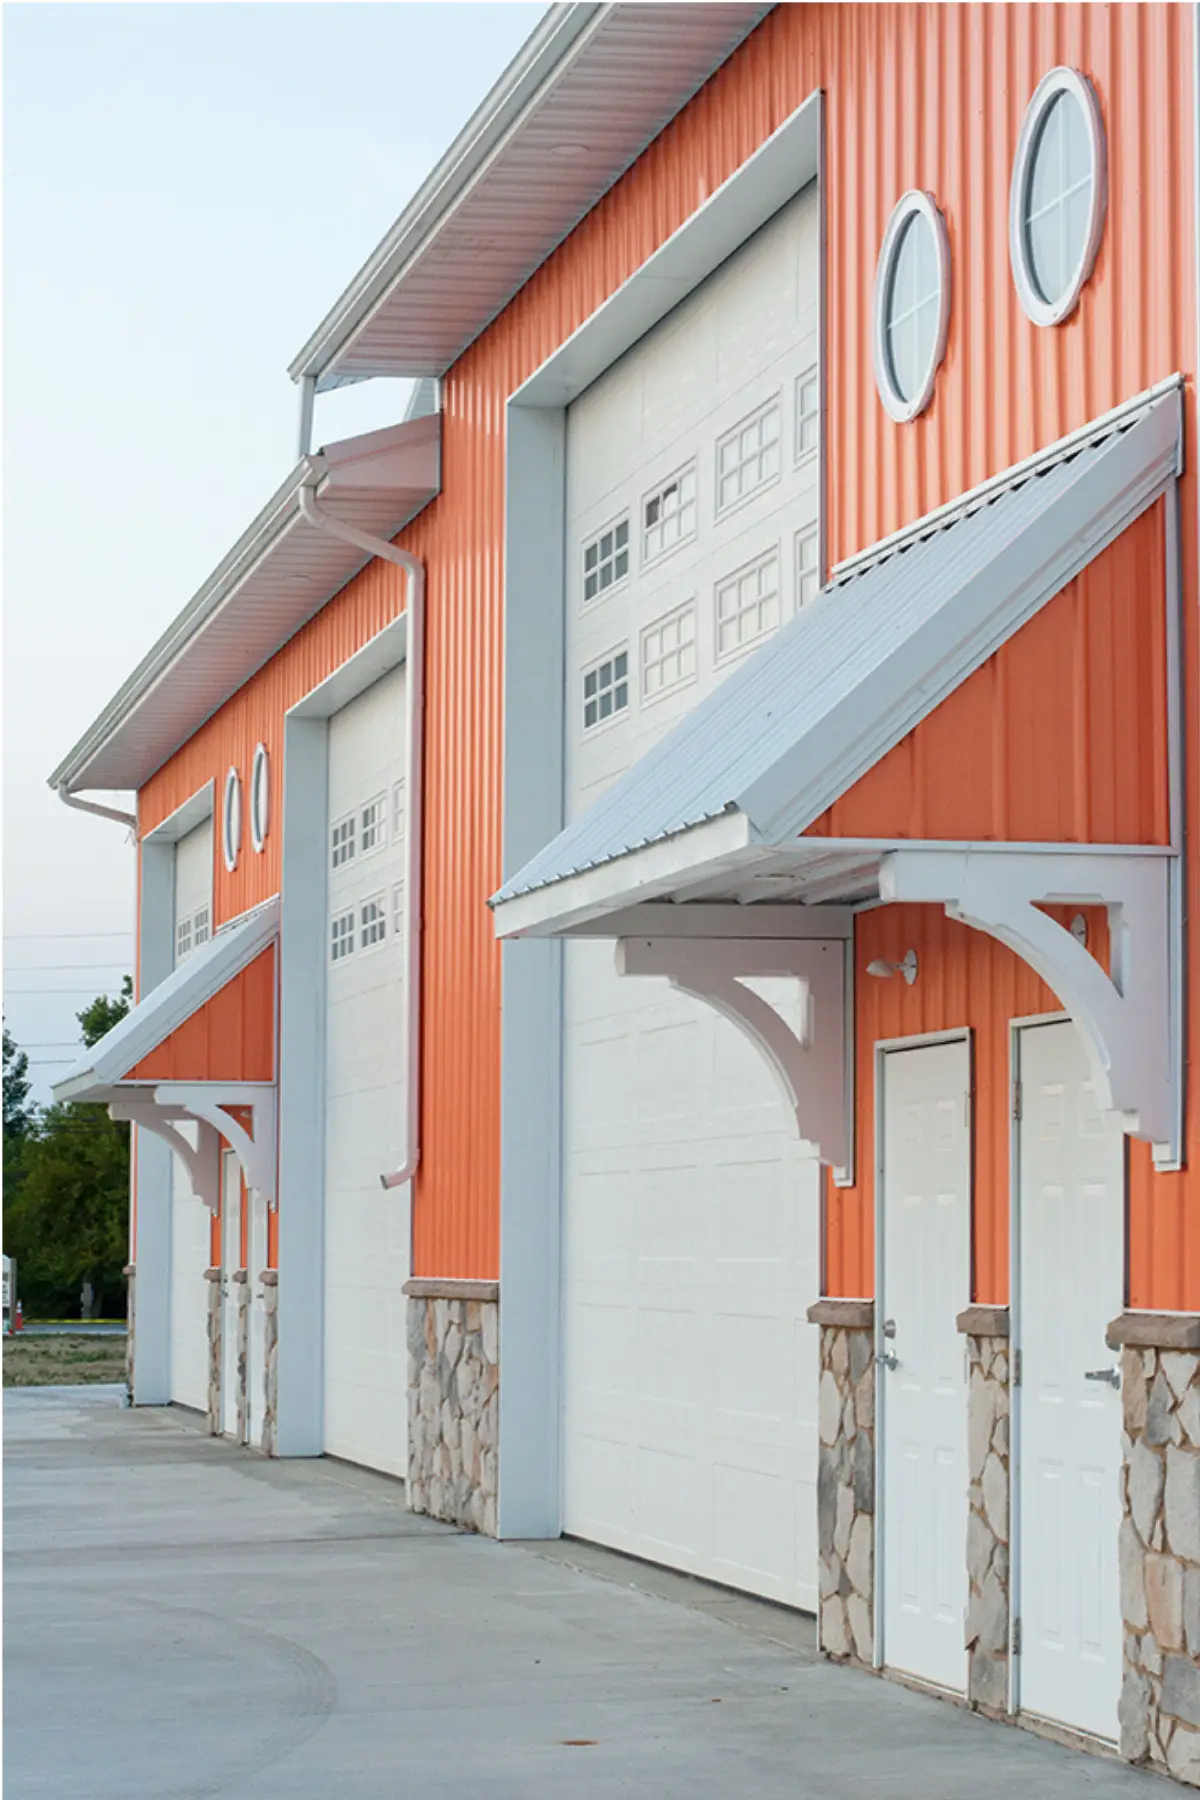
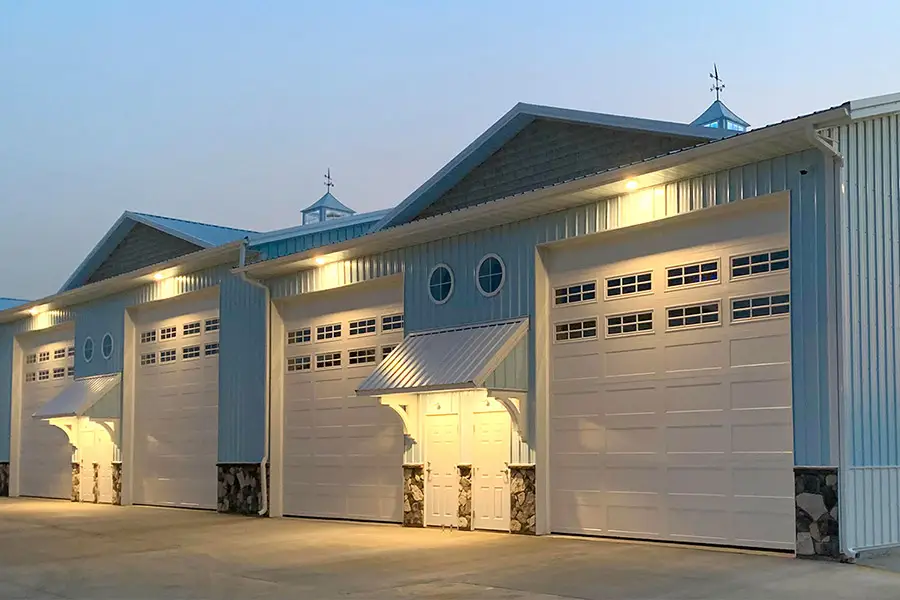
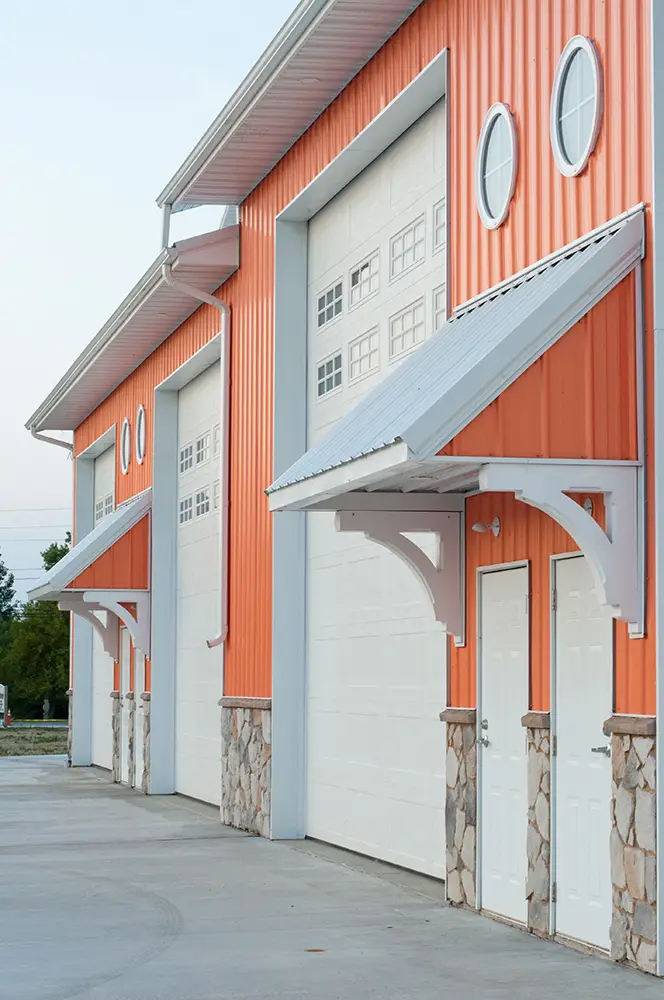
Country Building Co sourced custom Parallel Rib metal panel profiles in bold, coastal hues: bright citrus greens, vivid oranges, and soft marina blues, all paired with crisp white trim and accents.

Those color choices weren’t just aesthetic; they became part of the Island Landings brand.
The coastal palette ties directly into Port Clinton’s Lake Erie boating culture, while the vertical Parallel Rib exterior emphasizes height and rhythm along the drive aisle, making each building read more like a boutique marina facility than a storage row.

Parallel Rib Panels And Stone Details For Curb Appeal And Durability

Country Building Co specified 40‑year, maintenance‑free 29‑gauge steel panels inside and out to give the development long‑term durability in a demanding lakefront environment.
 On the exterior, the Parallel Rib siding is combined with stone wainscoting, tall overhead doors, and distinctive round accent windows to create a look that’s both upscale and highly functional for large vehicles.

The Parallel Rib profile does double duty: its vertical lines visually stretch the walls, and its structural shape adds stiffness to the wall system, helping the post‑frame shell stand up to wind, lake‑effect weather, and years of use.

Because Country Building Co understands how panel profile, gauge, and fastening all interact with the framing package, the team was able to optimize fastening patterns and trims so the buildings stay tight and watertight while still looking clean up close.

Bright, Clean Interiors With Steel Liner Panel

On the inside, Country Building Co used white steel interior liner panel to create bright, low‑maintenance spaces that are easy to customize.
 The reflective finish of the liner panel works with abundant high windows, LED lighting, and ceiling fans to keep units feeling open and well‑lit, even when they are packed with boats, RVs, or vehicle collections.

Because the liner panel is also 29‑gauge steel, owners get walls and ceilings that resist dents, scuffs, and moisture better than gypsum or OSB—an important advantage in spaces that see constant movement of trailers, tools, and equipment. 
Integrated floor drains, high R‑value insulation, and powered overhead doors complete a package that is as functional as it is attractive.

Post‑Frame Expertise In Every Phase Of Construction

These buildings are more than pretty shells—they are high‑performance post‑frame structures engineered to handle heavy snow loads, wind exposure, and large door openings.
Country Building Co’s design team detailed the laminated posts, truss spacing, and purlin layout to support long clear‑spans, tall sidewalls, and wide overhead door headers without compromising structural integrity.

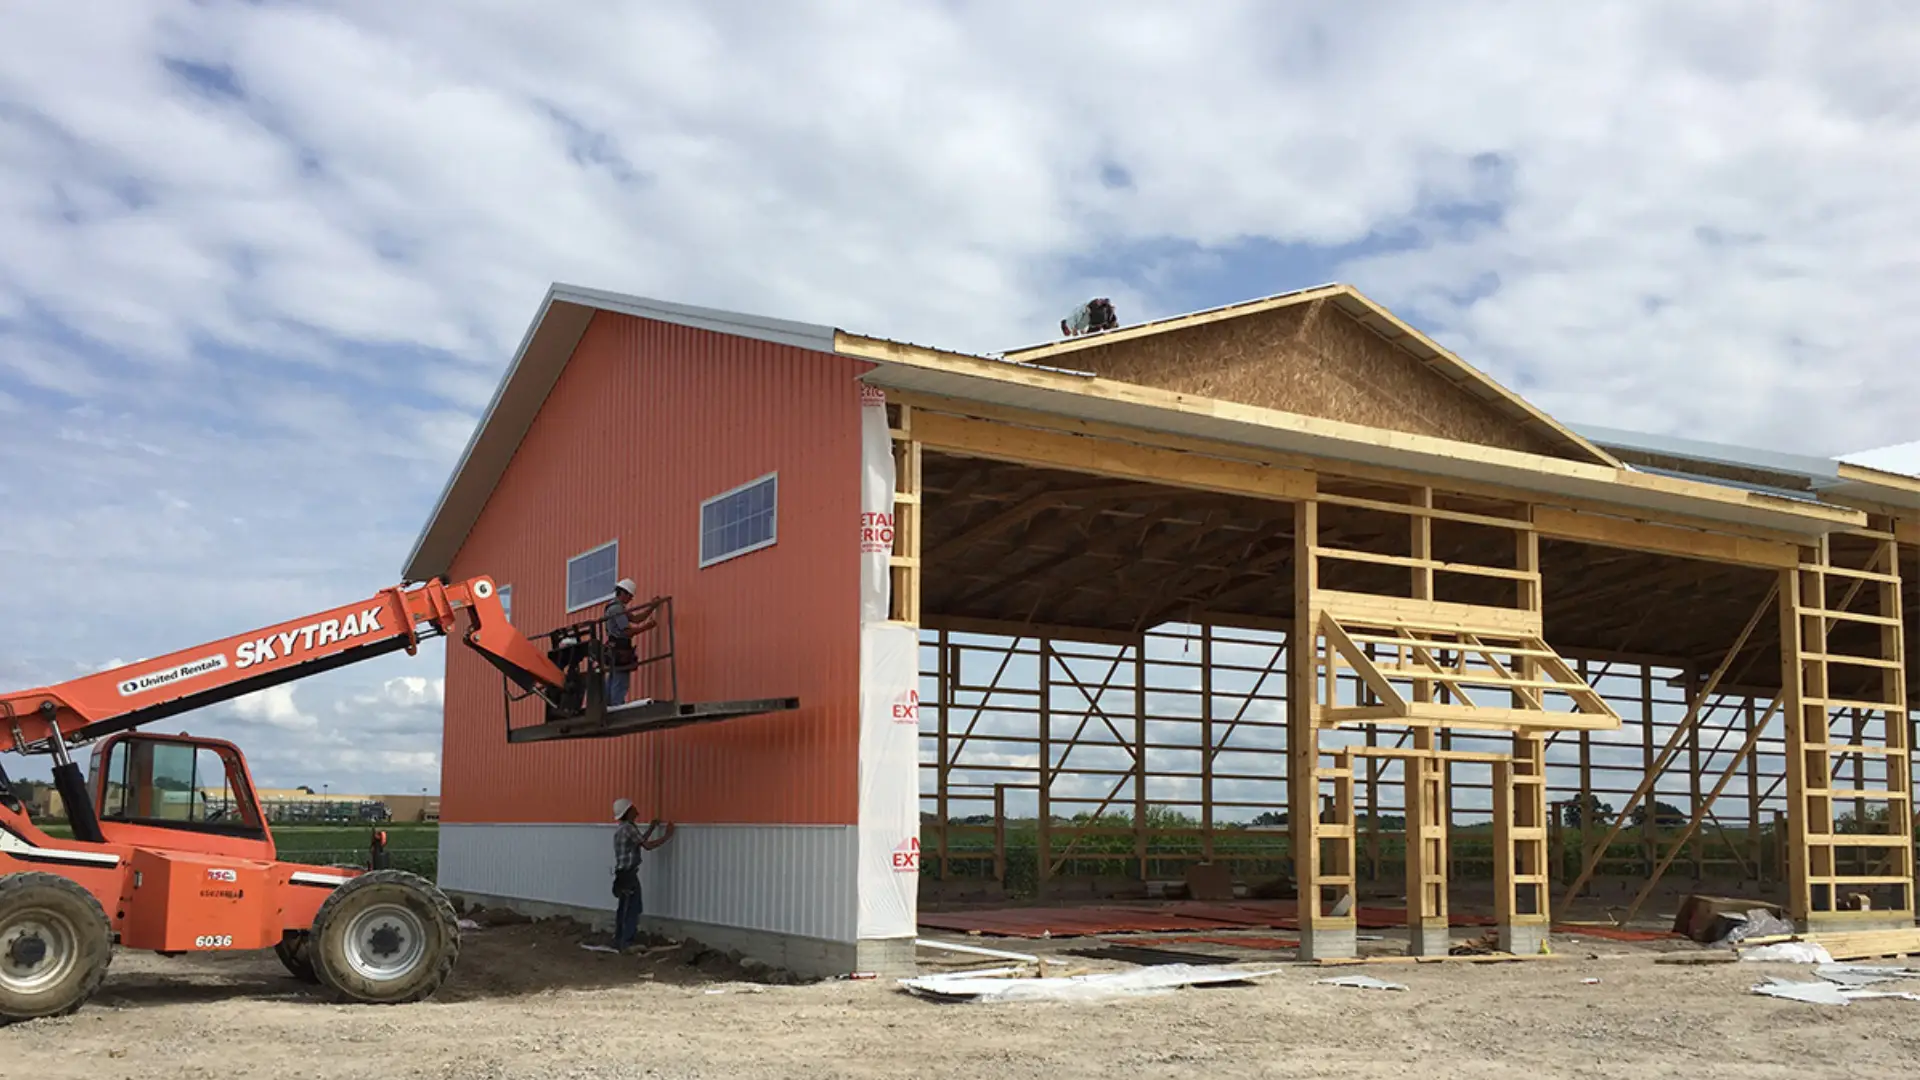
That engineering detail shows up in the field. As units were framed and sheathed over multiple phases, the layout supported clean expansion, consistent roof planes, and precise alignment of canopies, man doors, and overhead doors from building to building.

The result is a campus that feels like a single cohesive development, not a patchwork of different projects.

Custom Cupolas: The Detail That Ties It All Together

One of the most recognizable elements at Island Landings is the row of lighted cupolas sitting proudly on each main ridge.
Country Building Co worked closely with Island Landings and our suppliers to design custom cupolas that match the building body color—right down to the citrus green and marina blue trims—rather than relying on an off‑the‑shelf white accent.

Those custom cupolas, complete with windows and weather vanes, are more than decorative.
They reinforce the “coastal condo” aesthetic promised in Island Landings’ marketing—stone fronts, coastal colors, and lighted cupolas are highlighted as signature features—and help the project stand out in a crowded storage market.

A True Team Effort: Old State Construction And Jason Zimmerman

Design is only half the story; execution is what makes a metal building project truly successful.
Old State Construction, a longtime Country Building Co partner, served as the builder and installer on the Island Landings project, bringing Amish craftsmanship and meticulous attention to detail to every frame, panel, and trim piece.

Project lead Jason Zimmerman from Country Building Co guided the design from concept through completion, coordinating color selections, panel profiles, structural details, and those custom cupolas that became the visual signature of the site.

Jason’s ability to translate Island Landings’ “store your toys in style” vision into buildable, repeatable post‑frame designs allowed the ownership team to expand over several years while keeping costs controlled and aesthetics consistent.

Recognized Quality: Award‑Winning Commercial Facility

The combination of smart post‑frame engineering, custom metal exteriors, and high‑end interior finishes has not gone unnoticed.
Island Landings received a Buckeye Building Award in 2018 for Commercial Facility over 5,000 square feet, recognition that underscores the quality of both the design and execution.

That award is a testament to what can happen when an owner with a bold idea teams up with a design‑driven metal building supplier and a trusted construction partner.
For Island Landings, the result is an investment‑grade property that functions like serious storage—but looks and feels like part of the Lake Erie resort experience.


Building Your Own One‑Of‑A‑Kind Storage Concept

If you’re dreaming about a storage or business‑condo project that does more than check a box on square footage, Country Building Co can help you do what Island Landings did:

  • Use custom Parallel Rib colors to turn buildings into a recognizable brand.

  • Combine post‑frame engineering with 40‑year steel and interior liner panel for durability and low maintenance.

  • Integrate details like stone fronts, canopies, and custom cupolas that make metal buildings feel anything but ordinary.

From first sketch to final cupola, our team—and partners like Old State Construction—know how to design and deliver metal building projects that stand out on the road and perform for decades in the field.

Share the Post:

Related Posts